posted on: 04/05/2023
“An undercut pixie is not for the faint of heart,” says Teresa Romero, creative director for Sam Villa and artistic/education director for Jose Luis Salon (@_teresa_romero). “Almost any texture can support the disconnection, movement and versatility, but the execution can cause many stylists to panic. Knowing where to start and which tools to use can be daunting.”
To keep anxiety at bay, follow this easy approach for cutting an undercut pixie that involves creating a map for pre-sectioning. It takes patience, and (as always) bone structure, growth patterns, natural texture, and the guest’s styling routine must all be considered. Get a glimpse of the process here.
“Leave the hair longer at first; you can always go back and remove more length . . . and texturize once the hair is dry,” adds Romero.

No-Panic Step-by-step Undercut Pixie
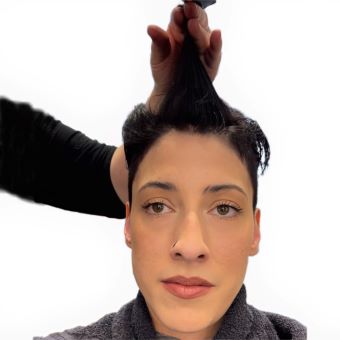
1. Follow the natural bone structure. Section the top and center hair back from the sides and areas behind the ear. Secure with a Sam Villa Hair Grip.
.jpg)
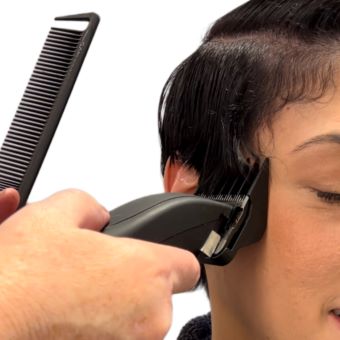
2. Using a #4 guard on a clipper, cut hair below the section line. Then repeat on the other side of the head.
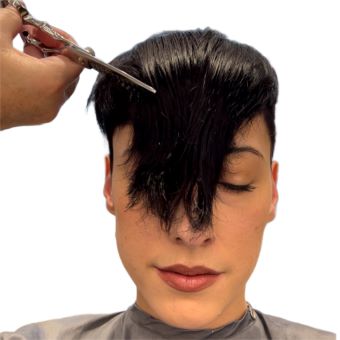
3. The top and center section will be disconnected from the sides and area behind the ears. Comb the top forward and cut into a deep V shape.

4. Repeat step 3 on the opposite side of the head.

5. Elevate the top section straight up. Add layers to this area and the center back. Make sure to keep the top and center back longer than the sides.
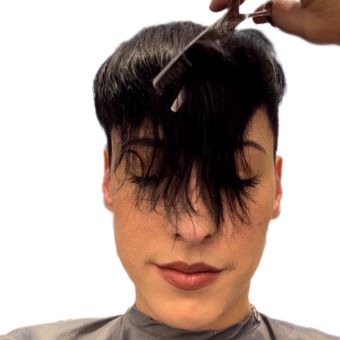
6. Comb the top forward and use a Sam Villa Signature Series 14 Tooth Point Cutting Shear to add texture, cutting across the top right to left.
7. Repeat step 6 and start cutting from the left and going to the right—a crisscross pattern.
“Practice on a mannequin so the next time a client sits in your chair and asks for a pixie you won’t panic,” says Romero.
Credit: Hair/Photographer - Teresa Romero, Sam Villa Creative Director; Model - Misha Pahl.
Learn more from the Sam Villa Team by booking a class here or tuning into free Facebook Live classes and YouTube tutorials. His inspiring education and innovative and ergonomic styling tools can be experienced on samvilla.com.